


VPN macOS: Cisco Secure Client
Removing old Cisco (Anyconnect) Secure Client installations
If the Cisco AnyConnect VPN client is already installed on your system, you must remove it before a new installation.
Important: Please do not try to uninstall the Cisco AnyConnect VPN client by moving it to the recycle bin or simply deleting it manually in the Applications → Cisco directory, as this will result in an incomplete uninstallation. This does not work for some apps outside the Appstore (usually if you have an installation dialogue, such as Cisco, SPSS, Matlab).
Standard uninstallation: Select automatic uninstallation under Programs → Cisco → Uninstall AnyConnect and follow the uninstall instructions.
Remedy an incomplete uninstallation (only if standard uninstallation is impossible): If you should have accidentally deleted the Cisco AnyConnect VPN client manually or via the recycle bin, it is possible that the standard uninstall is no longer possible and prevents a new installation. The easiest way to solve this problem is via the terminal. Carry out one of the following steps on the Mac:
Click on the Launchpad icon in the dock ![]() , enter "Terminal" in the search field and click on "Terminal".
, enter "Terminal" in the search field and click on "Terminal".
Open the "/Applications/Utilities" folder in the Finder ![]() followed by a double-click on "Terminal".
followed by a double-click on "Terminal".
You can now enter commands directly in the terminal. We proceed as follows:
- Enter the following command:
sudo /opt/cisco/anyconnect/bin/anyconnect_uninstall.sh
You will then be asked to enter your user password for MacOS in the terminal. Your entry is NOT displayed while you are typing, and no cursor movement is visible; you must then confirm the entry with .
Then try installing Cisco AnyConnect VPN Client again.
-
If step 1 does not work, continue with this point.
Attention: Incorrect entries can lead to the permanent deletion of important data. Therefore, please enter only one line at a time, confirm this only after a thorough check with and confirm the deletion again with . You may also be asked to enter your MacOS password. As long as you check the entries for correctness before confirming, there is no risk of accidental deletion.
Enter the following commands line by line:sudo rm -RI /opt/cisco/anyconnect
sudo rm -RI /Applications/Cisco
sudo pkgutil --forget com.cisco.pkg.anyconnect.vpn
Then try installing the Cisco AnyConnect VPN client again.
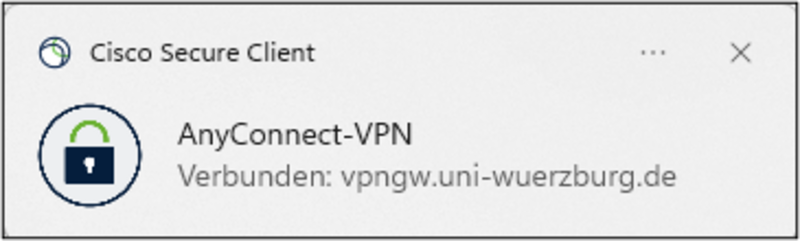
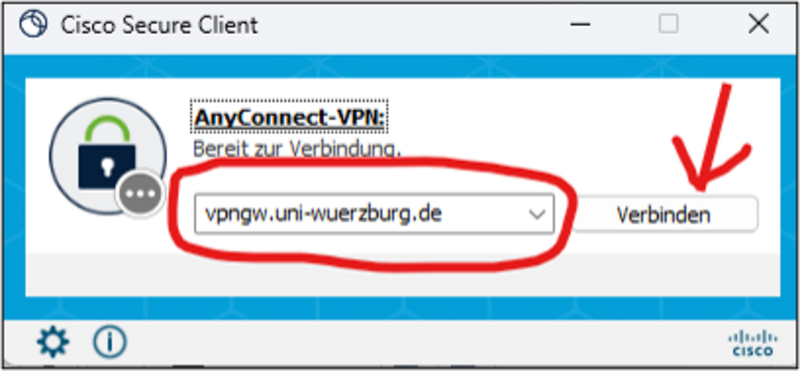
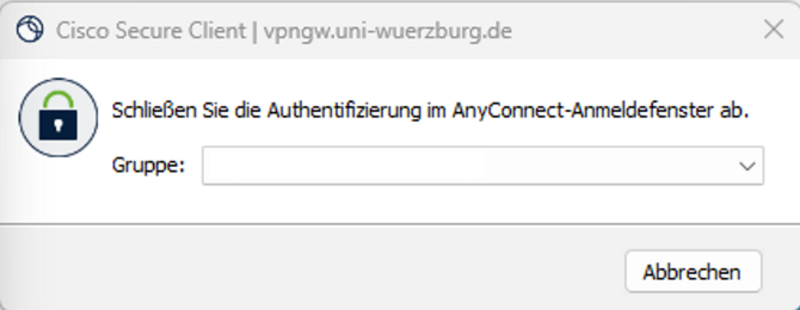
The Cisco Secure Client must first be installed on your PC. To do this, follow the instructions "Cisco Secure Client Installation". For a VPN connection from outside to the university network, start the Cisco Secure Client and establish the connection.
Multi-factor authentication is mandatory for VPN starting November 10th 2025!
YubiKeys are not supported under macOS for VPN login. Please use another MFA method instead, e.g. the Microsoft Authenticator app or a TOTP app.
VPN connection with functional accounts is no longer possible.
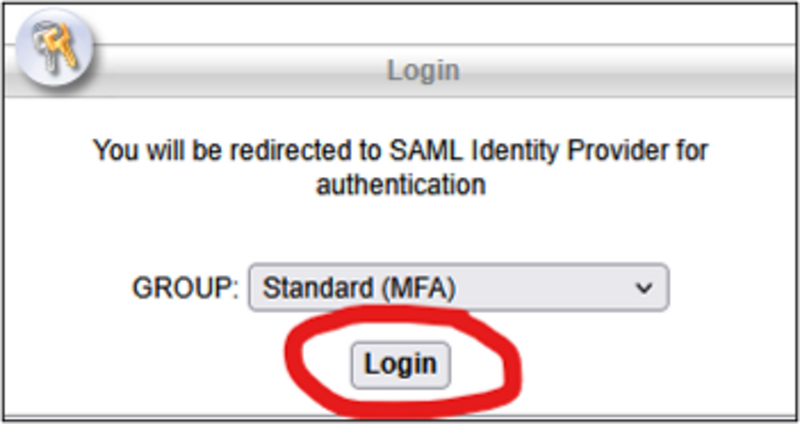
- Open the link https://vpngw.uni-wuerzburg.de
- Select "Standard MFA" as the group and click on [ Login ].

- Log in now via WueLogin; if you are already logged in to another service via WueLogin, you do not need to log in again.
- You may be shown the "Information to be submitted to the service". In this case, scroll down and click on [ Accept ].
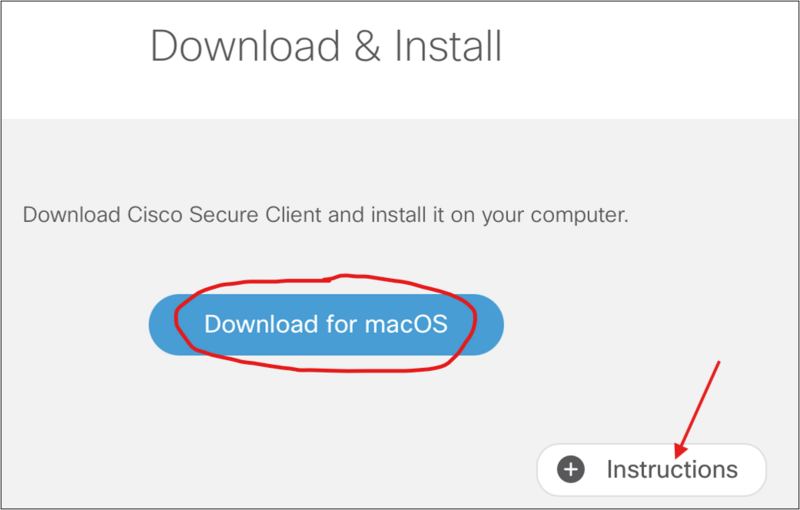
- Click [ Download for macOS ] to download the installation file "cisco-secure-client-macos..k9.dmg"
- Start the installation by [ Double-clicking on the downloaded file ]
Details on the installation process can be found under [ Instructions ]
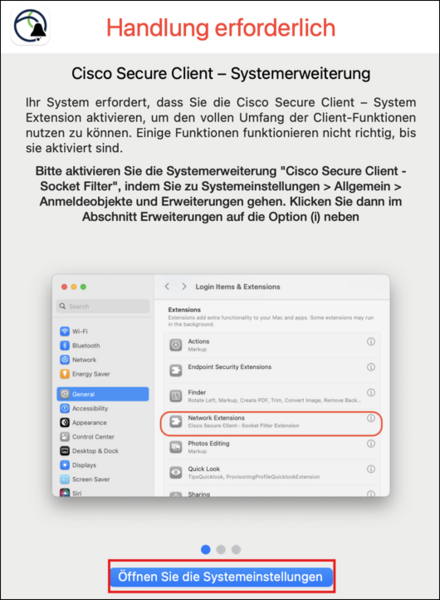
- During installation, you may be prompted to activate VPN services.
- To do this, [ Open the system settings ] and activate the [ Cisco Secure Client - AnyConnect VPN Services ] option under [ General ]

- You can choose between these profiles in the [ Group ] selection field:
Standard (MFA) (Tunnel-All): all data traffic on your PC is tunnelled via the university and goes from there to the Internet. Necessary e.g. for online research in the library or for BayZeit.
Access only to the university network (split tunnelling): only the data traffic to the university is tunneled (IP address from the university network 132.187.*). For example, you can access internal university servers that are not open to the outside world.
Access only for SBL (Start VPN before Windows Logon): not for macOS.
- Log in via WueLogin.